Sunday, April 29, 2018

Let's Get Planted!

Planted Tank Tips 

After lightly dosing the planted tank I keep in my living room with trace nutrients earlier today, it occurred to me that I could share a few bits of wisdom that I've gleaned over the last couple years of keeping a planted tank. I have to offer a disclaimer, however, that I am not an expert on this topic by any measure of the word. Instead, I approach this topic as little more than a hobbyist who has had his share of successes and failures with planted tanks over the years.


Here are some tips (in no particular order)...

  1. Lighting and Plant Selection: Go with low light plants if you don't have good lights. Start with the easy ones like anubias and java fern (or java moss if so inclined), moving up to amazon swords and others before you go with more difficult plants. Watch a few YouTube videos and read a few online forums to familiarize yourself with the needs of the plant. Then try not to mess with the plant too much after you set it in the tank. Give them time to adapt. Patience is essential in the early stages.
  2. Lighting: Get decent lights. They don't need to be any particular top brand, or any name brand at all. Just get as much coverage and as bright a light as you can. I have had success with relatively "low-cost" LED light strips (the white/blue type, not the flexible strips) that I bought on eBay, but I still spent about $100 on lights for my main tank all told, just to have enough coverage. I have also had a great deal of success with LED floodlights (similar to these) in my fish room.

    Tip: If you're going with floodlights, look for something in the daylight color range (6000K).
  3. CO2: CO2 definitely helps. The level of CO2 in your tank will limit your plant growth. You can go with the liquid form at first if you're not sure about the relatively steep cost of starting up a CO2 system, but if you stick with it, you will eventually want to get a tank, regulator, diffuser, and CO2 airline. Don't worry. It's worth it.

    In an aquatic environment, CO2 is not as abundantly available as in the air we breathe. Increasing the level of CO2 in your aquarium will make your plants grow faster and better. This is the fuel for their cell-building. More fuel means more more cell-building. Isn't that the point? As an added bonus, CO2 helps control algae as well!

    Tip: Keep the dosing of CO2 constant as well. Fluctuating CO2 levels can be problematic.
  4. Fertilization and Algae Control: When using liquid nutrients, spread the dose across the days of the week. For example, if your total dose of a given nutrient is 9 capfuls once per week, administer it as 3 capfuls, 3 times a week instead. A plant can only consume so much at any given time. Once it hits the maximum rate of absorption, the rest of the nutrients are left floating in the water column, ready for any algae that might be lurking in your tank. Plants are able to uptake nutrients much more easily when the dose is spread out, and it leaves fewer nutrients for algae to consume in the end.

    NOTE: This is definitely a balancing act with any waste that you might have coming from fish, invertebrates, or other life in the tank too, including the remains of dead, wilted leaves which decompose and add more nitrites to the system. Dead leaves are inevitable, and fish waste is a natural source of nutrition for an aquatic plant, but it can get out of hand very quickly, especially if you have a large die-off of plants, an over-stocked tank, or too much food waste. 

Thursday, January 19, 2017


The Fish Room Project

Update #6 

Well, they'e done it again! My discus fish are in full parenting mode. I wasn't going to raise this new generation of discus yet, but my curiosity got the best of me, so I'm going to give it a shot. I really want to see what this new generation will look like. I'm hoping for solid- to near-solid cobalt blue. They have good genes, so it is very possible to get some really nice fish from this batch of wrigglers.

Here's a video of the proud parents and their brood. They moved the babies to the sponge filter elbow. This is a much better spot than the canister filter intake tube where they laid the eggs. Now I can cover that intake with a piece of filter floss.


I am planning to automate many of the functions that I will need to perform. It should be easier to maintain the tank this time, but I'm also going to make a couple of changes to accommodate the babies I might eventually raise from this brood.

I made a couple of changes in the 4-tank system too. I added a bag of Seachem® Purigen to the sump. I also cut out a couple layers of flat filter material I had used once in a failed attempt at a divider and put it over the bio balls in the trickle tower portion of the filter. I had it lying around for a while and finally figured I'd give it a try.

Let's see what happens.

Monday, January 9, 2017

Bonus! My Visit to Jack Wattley Discus Hatchery


Bonus!

A Visit to the Jack Wattley Discus Hatchery in Miami, Florida!

Before I begin, I have to say that this is one of my absolute favorite fish-nerd places to geek out at in Miami. If you know about discus fish, you will easily recognize the name, Jack Wattley. Mr. Wattley is one of the best-known authorities in the field of discus breeding around the world. In fact, he is one of the principal founders of discus breeding culture in the United States, having published several articles and books, and lecturing at national and international conferences over the last several decades, ever since discus-keeping took off in the United States beginning in the 1960's. Needless to say, I really wanted to write about this hatchery for a long time.

Last March (2016), I decided to visit the world-renowned Jack Wattley discus hatchery in Miami, Florida (https://wattleydiscus.com). Unfortunately, Mr. Wattley does not run the hatchery himself anymore, having retired and delegated that responsibility to one of the hands-down coolest and most knowledgeable fish-breeders you will ever meet, Gabe Posada, who is doing an outstanding job of running the hatchery for Mr. Wattley nowadays. Luckily, the hatchery is in very good hands. Gabe is extremely knowledgeable about discus-keeping, and I find him to be a very open and friendly guy with everyone who stops by, not just me. That's a character trait I admire in the people I meet, and I am happy to see that the legacy of Wattley Discus is in such capable hands. Gabe is always happy to share all sorts of valuable information for both novice and experienced discus hobbyists, so I'd strongly recommend you pay him a visit there whenever you're in town. Just call ahead of time to make sure he knows!

Here are some pictures of my visit last March. As you can see, there are many outstanding, high-quality specimens of several different varieties of discus.

The wild discus fish shown below are the biggest I have ever seen! They are about as large, maybe larger, than my fully open hand!

I found these albinos to be particularly eye-catching. This picture does not do them justice, but I'll post it anyway.

Here are some Heckel discus (some "wilds" too, I think)...

Again, the albinos...


This is me, showing one aisle of the hatchery, from about the middle.  I strongly recommend you visit and support this valuable contributor to the development of the discus raising hobby if you are interested. It's worth the detour on your way to the beach!


See you next time!


Saturday, January 7, 2017

The Fish Room Project: Update 5


The Fish Room Project

Update #5

A picture of my fish room.

There you go! Another year come and gone, and my fish room has been purring along beautifully for several months.

I'm about a week late in posting this (I meant to post something on New Year's Day), but I am so glad that 2016 is finally over! It was an action-packed roller-coaster of a year for me in so many ways, and 2017 is promising to be every bit as crazy too. At least I've got my fish room though! It's been up and running now for several months, after having worked out the plumbing, lighting, filtration, electrical connections and cycling the tanks for several months. 

I know I didn't have to cycle the tanks so long - a month would have been enough, probably - but I was too busy with my job during the spring and early summer to be able to dedicate much time to the system, and when I did finally have enough time on my hands, we had to tent the house for termites. This meant removing all of my fish, unplugging and covering my tanks, and removing the water. They said that the poison gas would not penetrate the water, and the foggers that my wife and I set around the house afterward (to kill the ants and everything else that would eventually return) are not supposed to penetrate water either, but that doesn't mean it would not affect the water quality would be unaffected by the temperature and lack of water circulation for a few days. The dead bacteria in my canister filters alone could have killed everything in a tank, so I took the opportunity to clean the filters thoroughly, replace most of the water in all of my tanks, and begin the cycling process again.  Unfortunately, I went a little too far with the planted tank in my living room, making an almost 100% water change, using water straight from the hose, on a day with record high heat for South Florida. Needless to say, this was a mistake (aka "learning experience") that I do not intend to repeat. I wound up killing most of the plants, but a few Amazon swords did survive and a few valisneria spiralis melted down badly but not completely. I let that tank cycle again before replanting it, and I am happy to report that everything in that tank is thriving now. 

Here's a picture of the planted tank in my living room. It's not technically part of my "fish room" per se, but I have been moving plants over to the fish room tanks as this tank becomes crowded and overgrown with plants and I occasionally have to thin it out.

A picture of the plants in the 90-gallon tank in my living room.

I'm glad to see that all of my tanks are doing great lately. They have reasonable bio-loads, about 20 gallons per fish on average, and I've recently increased my water changes too because I am bulking up my fish a little. I want to see them as healthy as possible, and it looks like things are going well overall.  In fact, some of the young discus that I raised last year have paired up and begun to spawn lately, which is incredibly cool because it is the second generation of discus that I have bred. I'm not really looking to raise these babies right now - though I would love to - because I would have to move the three other adult discuses the rest to the tank below them, but I am currently using that tank as a quarantine tank (QT) for four longfin albino bristlenose plecos that I plan to introduce to my other tanks as soon as I can be reasonably sure that they won't contaminate my "native" population with any foreign disease or parasite, etc.

I learned my lesson about the value of a QT tank last October. I bought two of those same plecos as well as a koi angelfish, two snowflake discuses, a blue diamond discus, and a red melon discus from Wattley Discus in Miami and did not bother to quarantine them before introducing them to my general population. It's really not the hatchery's fault. The blame is on me, but the result was a disaster on a magnitude that I have never had to deal with before, simply because nothing seemed to be working for a long time, and it was costing me a small fortune to medicate so many tanks. I have over 350 gallons in total from my 7 tanks, and medication is not cheap! It was a depressing few weeks, and I lost many discuses (thankfully, none that I had paid for, since I had raised these myself), including some of my best babies, but I was lucky enough that some of them pulled through and now they are even spawning new broods. On a side note, the red melon has quickly become my favorite discus. It has such strong, dramatic colors, especially against the light blue background of the tank. I'll post a picture of it below, just for kicks, even though it really doesn't do this fish's colors much justice.


To be honest, I do want to raise one of these new broods. The pair that is currently spawning lay an incredible amount of eggs each time they do so, and they seem to be good parents, taking great care of these eggs while beating the crud out of any fish that gets near them. I'm really just dying to see what the babies will look like, since the parents have a lot of blue themselves, and their father was a blue diamond (the mother is a turquoise), meaning that I can expect at least 25% of these babies to be solid blue like their grandfather. That's really what I am aiming for with that particular breeding line. I'd like to see if my 25% theory pans out.  Here is another picture (last one, I promise!) of one of the parents with the first batch of eggs. See you next time!


Saturday, May 21, 2016

THE FISH ROOM PROJECT - Update #4

THE FISH ROOM PROJECT


Update #4

It's been a couple of months since I last posted, but I finally have a bit of free time to relax and write about what I've been doing with my mini-fish room project. The 1" pipes really worked out well and gave me exactly the flow I need while offering me a number of plumbing options and maximizing my usage of space behind the tanks. The first drain system I installed didn't quite work out, so I tore it down and re-did everything (recycling whatever pieces I could, of course). It's too bad I didn't notice the problems that the first drain system had until after I had glued everything together and tested it, but I guess that's what a test run is all about! 

Anyway, this drain system is working out well. It's what I should have done to begin with. I don't have any pictures of my current drain and return plumbing setup for the filter yet, but I've done even better this time: I finally have a video that I can share with you now..! Here is it!


On my last post, I was debating whether to connect the vertical drain pipe from each of the tanks above to the tank directly below them. You will note that this is not wha you actually see in the video. That's because I decided to try it out, and much to my chagrin, discovered that a straight 1" tee will not function properly as a drain if there is water flowing from above into the same pipe that it connects to. Essentially, it didn't work out. I couldn't connect the drain from the top tanks directly to the drains from the bottom tanks without having a little bit of water from the top tanks flow into the bottom. That also means that the bottom tanks were not draining properly.

I could have done something like this with 2" overflows on my tanks because there is a piece (a drain tee) that is designed specifically for this sort of application (it has a curve to it that prevent water from flowing into the side outlet. However, that would have been overkill in terms of flow rate, which is not really a problem. I just designed the system with 1" overflows in mind because that's all the flow rate I needed while maximizing the space behind the tanks.

An important side not for anyone building a fish room: leave yourself enough space to work with behind the tanks. You'll be spending a great deal of time there, especially at the beginning, and you need room to work, tighten pieces, adjust, turn around, etc.

In the end, I am pretty happy with my little setup. Put simply, it works as intended. Now I have to install lighting and lids, but that should be relatively easy and not really vital to the success of the rack as a system (not yet anyway). Instead, I think I'll turn my focus to purchasing, installing, and plumbing a large water tank in the corner of the garage. I'm going to install a constant drip system for automatic water change system so I will not have to break my back with buckets, etc. and I can achieve the greatest consistency of water quality. 


Monday, March 14, 2016

The Fish Room Project: Update 3

The Fish Room Project

Update #3

Last time I posted, I realized that my blog wasn't very eye-catching. I was missing images, something to give my blog some life, ideally something that would illustrate the stuff I've been writing about. Therefore, I determined to take some pictures of the next step, and this time I was prepared!

I was pleasantly surprised to receive the bulkhead kit on Saturday, just as I made up my mind to go ahead and drill the tanks. This was exactly the push I needed. I finally got up the nerve to do it, and I am very pleased with the results. I'm going to post some pictures and captions below and just get out of the way for now.

I set out to drill the tanks first thing in the morning (after feeding the kids, of course)...


I covered the work area, brought in the hose, got my materials together, etc.


I wasn't able to film myself drilling the holes, but the long, loud squeaking of the diamond hole saw was worth it. Actually, I was surprised that the glass didn't take longer to drill.  GLASS DRILLING TIP: Besides keeping water in the hole cutting area at all times, go gently!  Don't rush glass cutting!


Here are the tanks, freshly drilled, lined back up on a table in my yard.  I find it easier and more efficient to prepare all the tanks together, step-by-step rather than setting one up at a time.


I proceeded to paint the back and sides (Krylon Maxx, Coler: Aqua).  I really like how the light blue came out. It looks good against both the black frame of the aquarium and the false sand that I painted under the bottom glass.  You can catch a sense of that look from the tank at the bottom, right side.  The other tank at the bottom is coming soon. I just ran out of paint and plan to swing by Wal-Mart later tonight to buy some on my way home from work.


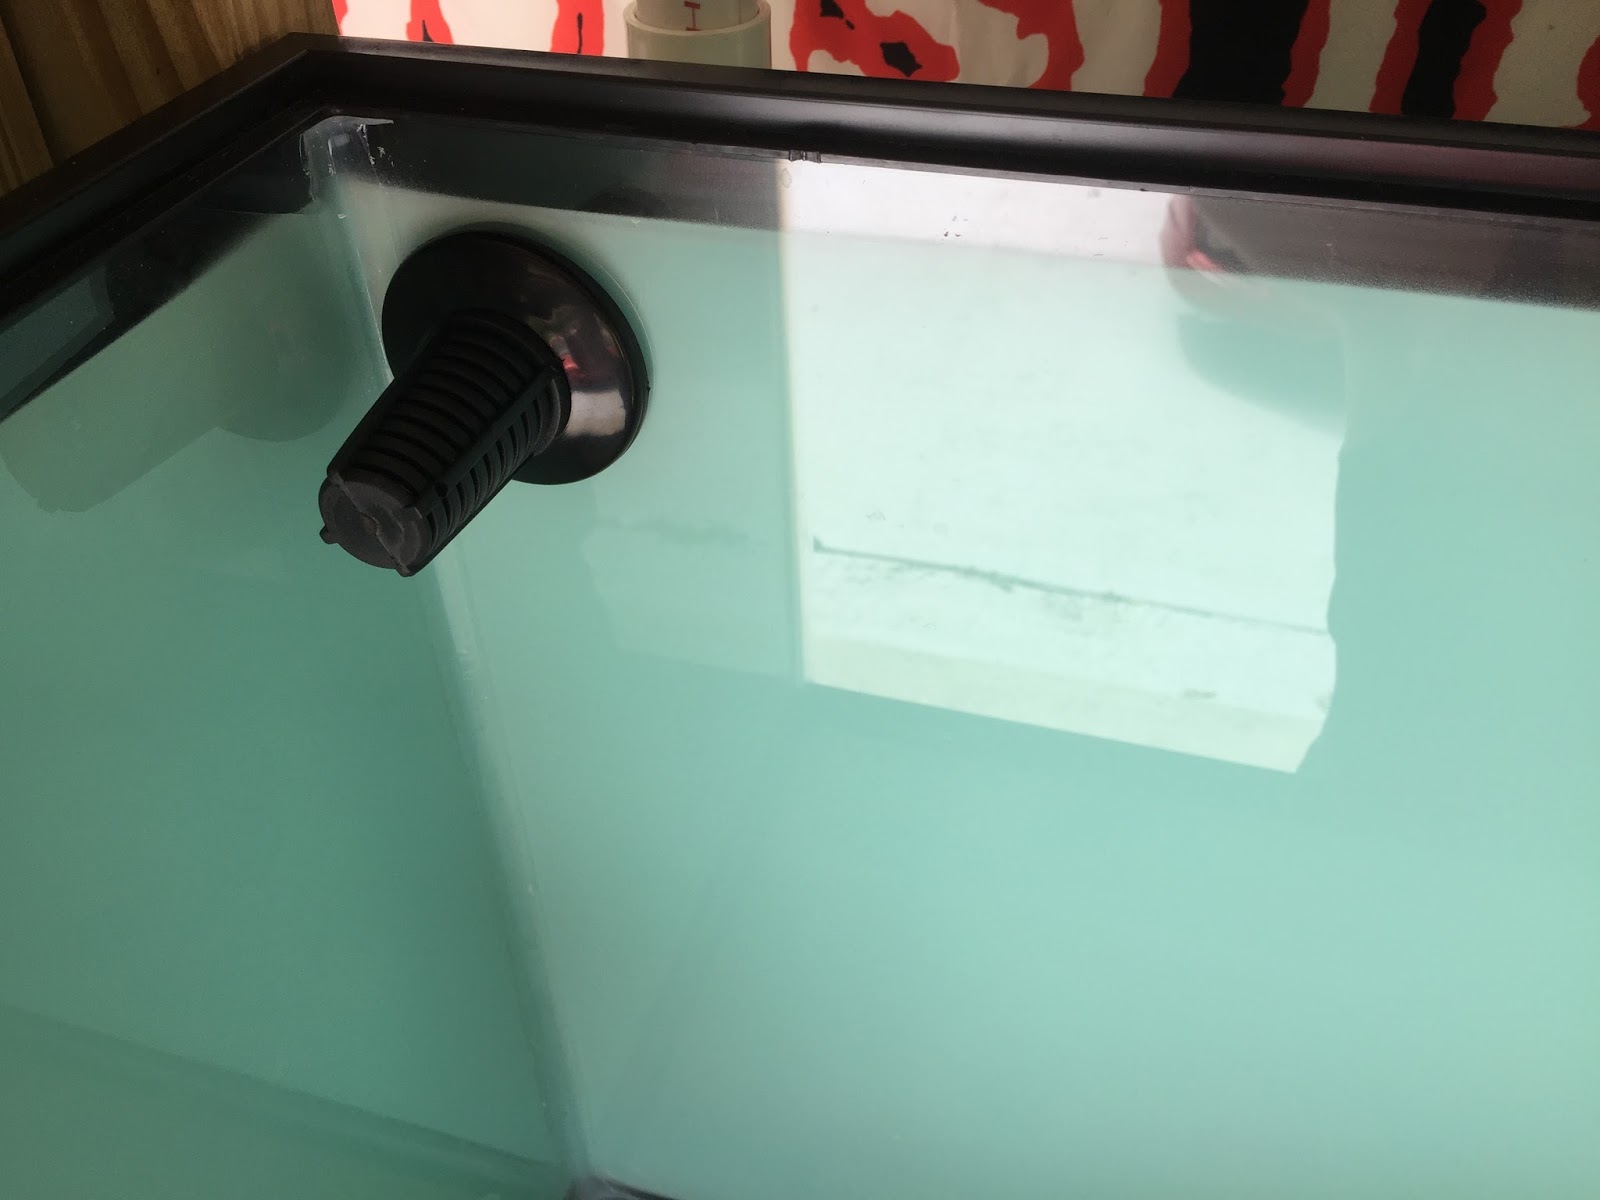
Here's a look at the strainer and overflow.


I noticed that the overflows lined up neatly above one another, so I could conceivably run one length of 1" PVC pipe down the back of the rack and into the drain pipe that will feed the wet-dry trickle filter at the bottom.  I'll think about it for a while. If I do, I had better install some unions in case I want to detach a tank from the system.


I'll keep you posted as I make progress on my mini fish room!

Wednesday, March 9, 2016

The Fish Room Project: Update 2

The Fish Room Project

Update #2

It's been a while since I've written up anything about my project, so I have quite a bit to report upon.  Since my last update, I've painted the bottom of the tanks with a fake stone texture and brick red color to make it look like sand from the inside of the tank. They look pretty nice, but I should have used more of the stone texture because it would have made it look even better. I only used one can for all four bottoms.  I should have known it wouldn't be enough. I also discovered, by happy accident of some polarized sunglasses that my beautiful wife gave me, that the tanks are not made of tempered glass, so I plan to drill the tanks and install regular bulkheads and overflows instead of the PVC overflows. I think the PVC overflows looked kind of cool in their own way (my uncle called it "industrial"!), but the traditional overflow is simpler and more reliable, which is what I'm ultimately going for in my setup. The delay caused by this modification to my plan will hopefully be offset by the benefit of streamlining my set up even more.

The diamond coated hole-cutting bits arrived a couple of days ago, but I quickly realized that I had not bought any bulkheads, washers, or any other fitting for the holes I intended to drill. I had done some window-shopping online but more to determine what I needed to do while I procrastinated the purchase, which actually turned out to be a good thing in the end because I saved some money. I had seen some nice low-profile strainers on Premium Aquatics, but they are almost $3 apiece, and that's not even counting the bulkheads. I ultimately went with eBay, where I found a great deal on four complete overflow kits with bulkheads, strainers (not the low-profile type, but I can always get those later), and the whole shebang, which is exactly what I needed.  I also bought a couple cans of a nice, light blue spray paint for the back and sides of the tanks, but I haven't painted anything but the bottoms yet because I wanted to install the bulkheads first. Now that I have the saw bits, however, I might just drill those holes soon, so I can go ahead and install the bulkheads as soon as they arrive.

In the meantime, I'm taking care of a sick discus in the 10-gallon quarantine (QT) tank that I set up on a couple of cinder blocks la couple of weeks ago. I kind of like the look of the cinder blocks to be honest. I think I'd really like to do something with that in a future build. As for the fish, I had two: a bigger one that did not fare well in the transition to the QT tank and died only a few days later, and this one. This one is doing better but hasn't eaten much, if anything at all, over the last few days.  I'm beginning to think the sickness that has been afflicting many of my baby discuses is parasitic in nature.  In any case, I have the tanks on a regiment of at least 25% water change every couple of days. I just need to stock fewer fish.  I don't want to keep more than a handful of the babies. so I will probably cull the smallest of the discuses and remove all but 4-5 from the the the the the 55-gallon tank in the living room.  If I have the rack set up by then (highly unlikely), or at least in place (which is more likely), I can even take the 55-gallon out of the office and put it in the garage in the spot, if not on the stand, that I intend to put it anyway.

I'll keep you posted...